Project Invoice Setup - Assisted Setup
Deprecated documentation
This page describes a former TWEECORE solution for Microsoft Dynamics 365 Business Central. The product is no longer under active development and this content is no longer maintained.
The easiest way to configure Project Invoice is to use the assisted setup.
Step 1:
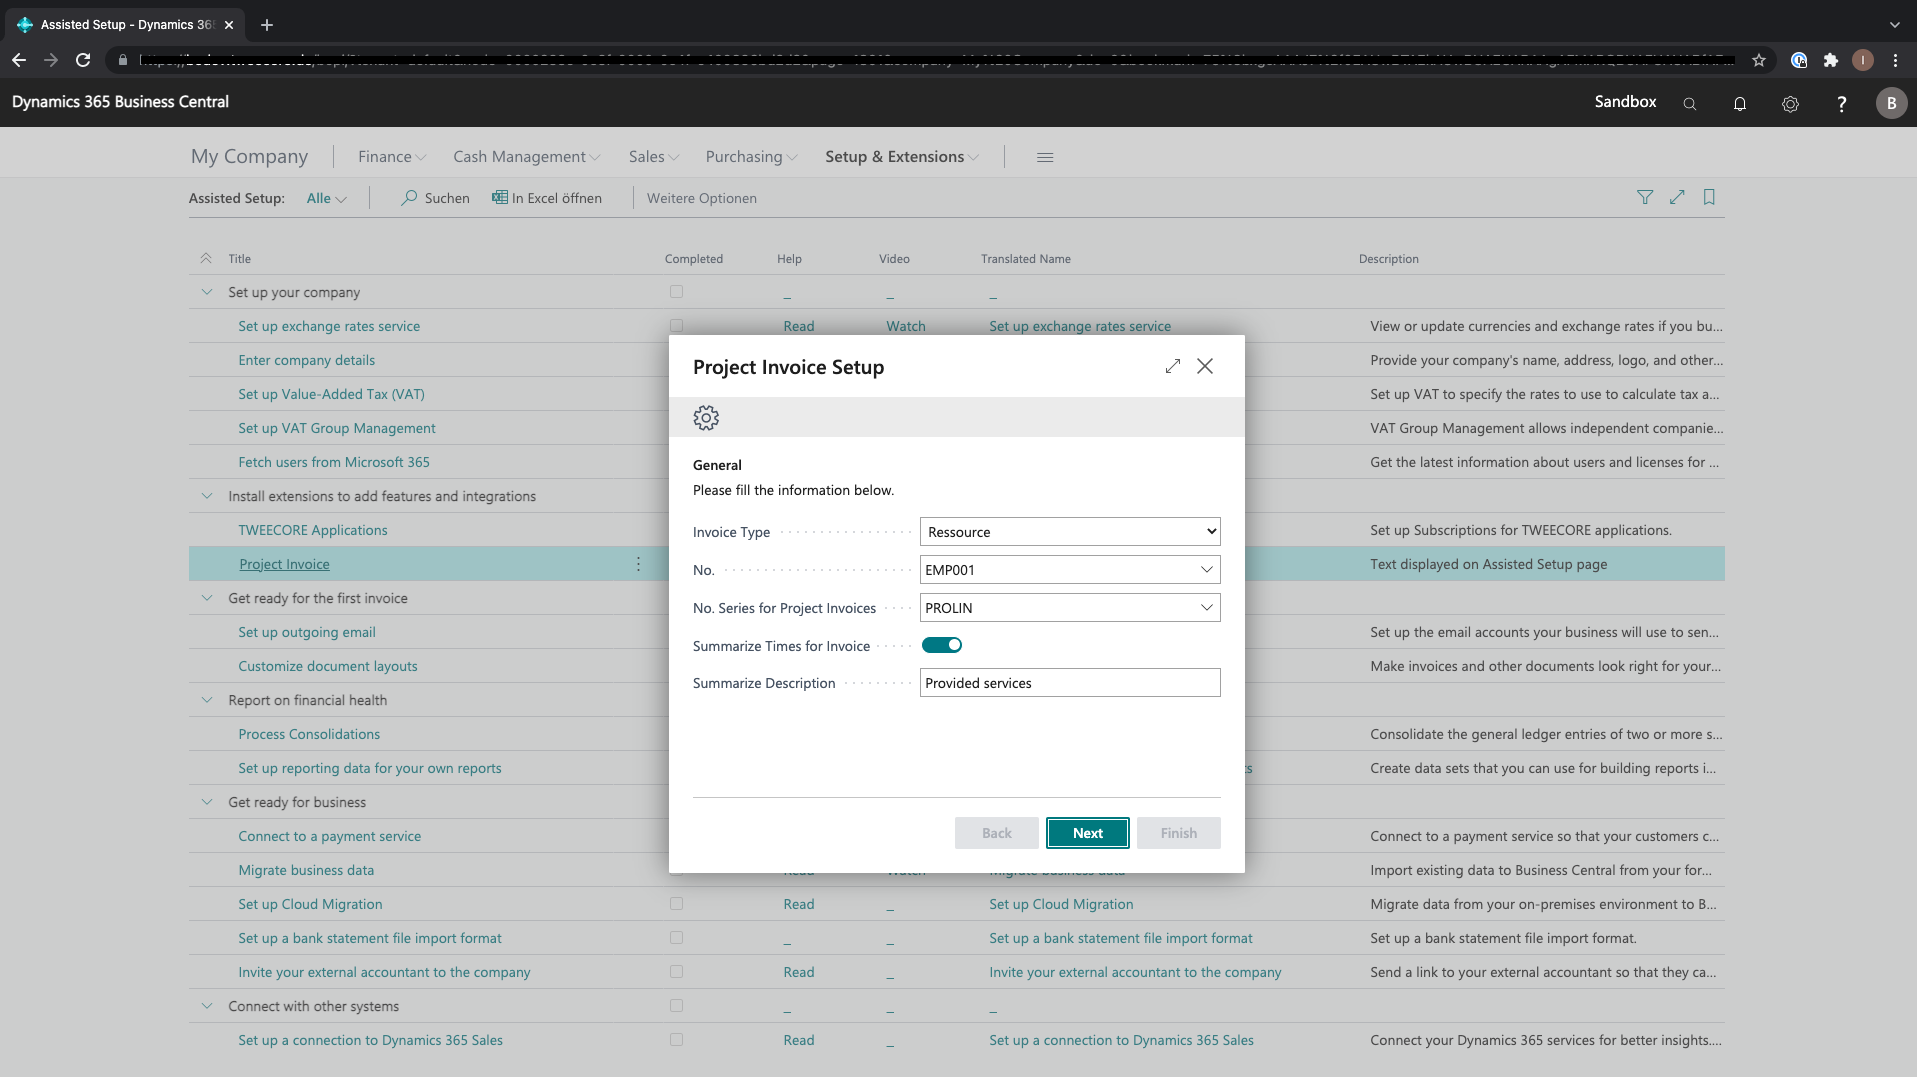
Invoice Type - this is the sales line type which will be used to be invoiced.
No. - this is the No. which will be used, G/L Account No., Item No. or the Ressource No. .
No. Series for Project Invoices - the No. Series will be used to create the imports from your project management system.
Summarize Times for Invoice - you are able to decide if you want to get every time description as sales line or want an summarized sales line and a detail report as attachment.
Summarize Description - if you selected to summarize the time lines, this will be the description.
Step 2:
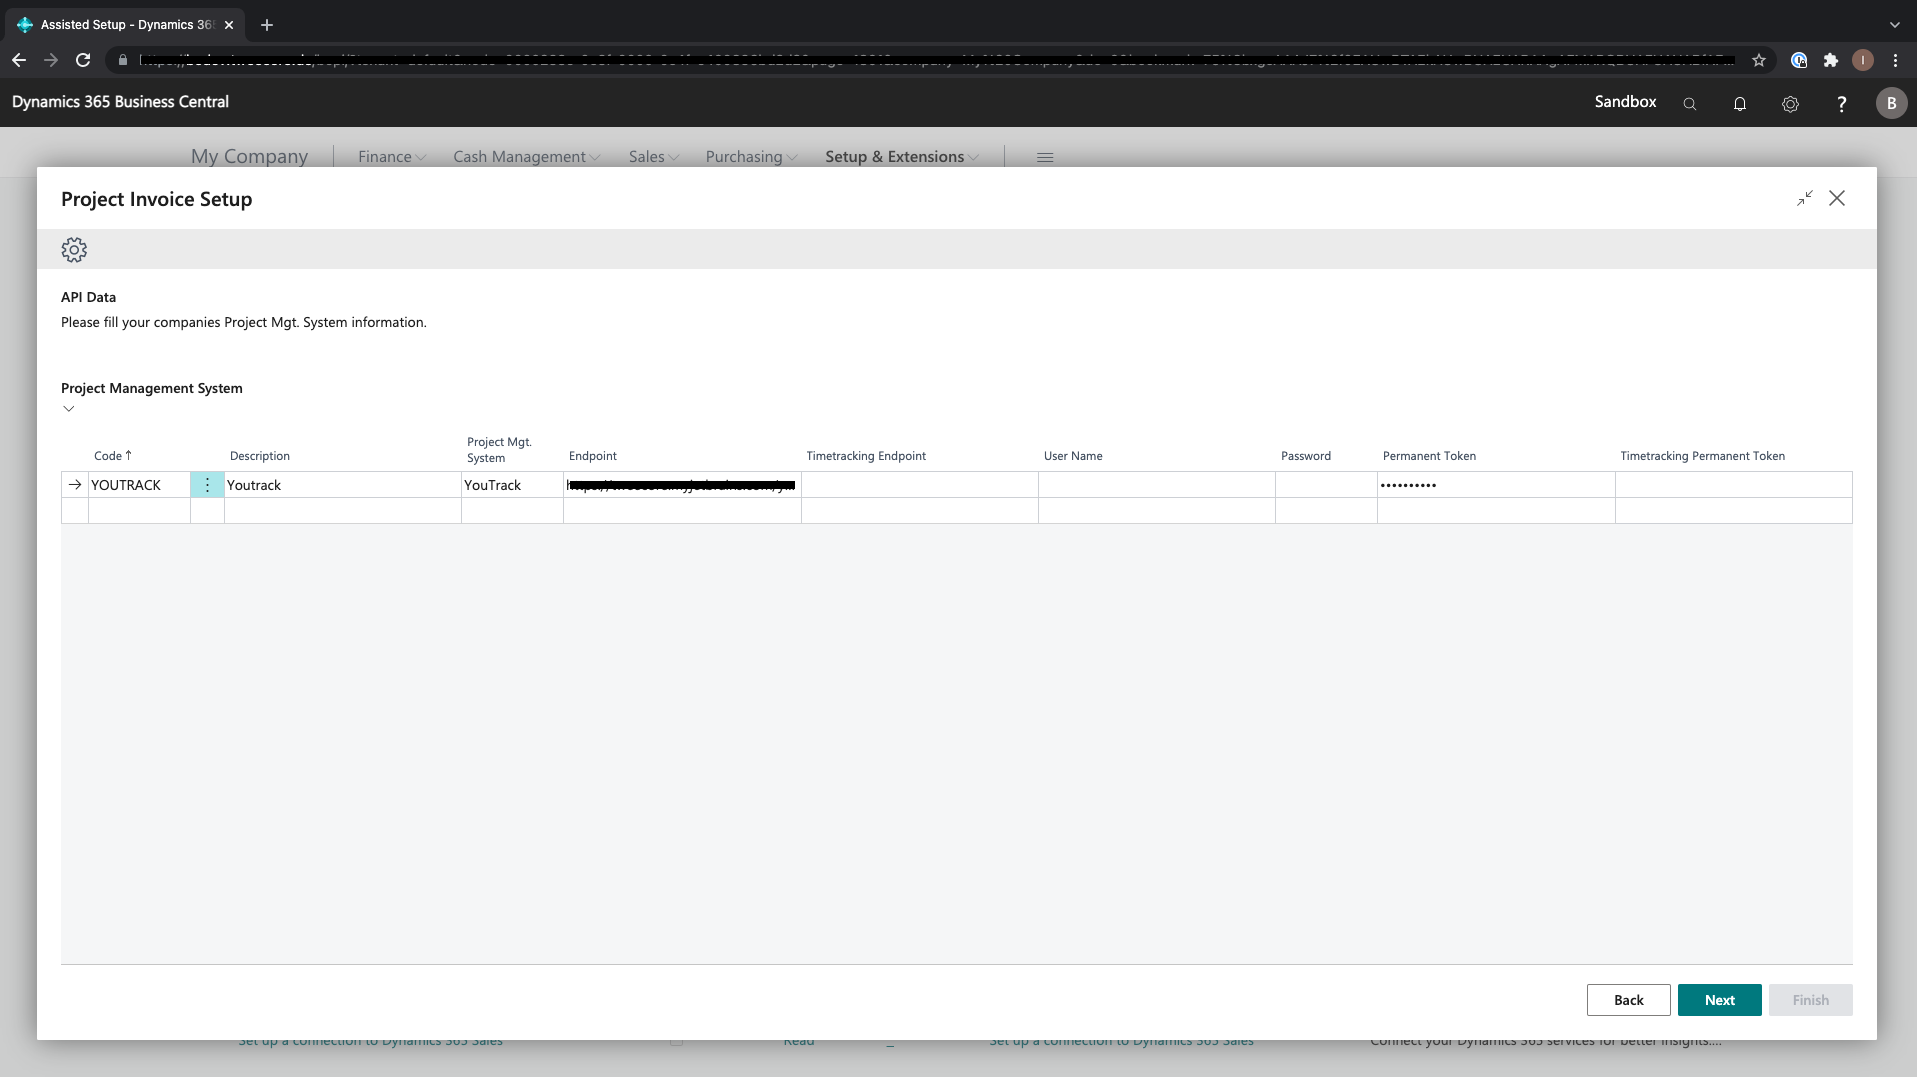
Code - unique name for the oAuth Application.
Description - description for this oAuth Application.
Project Mgt. System - defines which Project Mgt. System will be used.
Endpoint - url to the Project Mgt. System.
Timetracking Endpoint - this url will only be needed if you selected Jira (Tempo) as Project Mgt. System, please enter the Tempo Timesheet url.
User Name - user with enough rights in the project mgt. system, to be able to get receive the data of all projects.
Password - password for the user.
Permanent Token - api authorization key also known as permanent token which you can create in your Project Mgt. System.
Timetracking Permanent Token - this token will only be needed if you selected Jira (Tempo) as Project Mgt. System, please enter the generated token by Tempo Timesheet.